
My Leaky Bucket
Are you keeping the heat in your house? Upgrading a furnace in a drafty house is like pouring more hot water into a leaky bucket. Seal the leaks before you pay to generate the heat.

Improving your home’s insulation will
reduce greenhouse gas emissions by reducing the amount of energy used to heat and cool your house,
reduce your monthly bills to heat and cool the home, and
improve your comfort in your home by maintaining even temperatures inside the house.
The Heat Envelope
When it’s cold out, your home loses heat to the outdoors. The layer that surrounds the inside of your house where temperature is controlled is called the heat envelope - typically exterior walls, the ceiling, the doors and windows, the floor.
Heat still escapes the heat envelope, the goal is to minimize heat loss while maintaining some infiltration of fresh air. An initial step in making a home use less energy (and emit less greenhouse gas) is improving the heat envelope to optimize the amount of heat retained in the house.
You probably know where there are issues in your heat envelope: You know which rooms get cold or feel drafty; you know the rooms where you won’t sit and read a book because the space is too hot in the summer and too cold in the winter. (Note that this uneven heating can also be related to how your heating system is distributing heat.)
Some heat is lost through the direct movement of air between the inside and outside of the heat envelope through cracks and gaps in the heat envelope. Heat also escapes through the sealed portion of the heat envelope like through poorly insulated walls, windows, floors, or ceilings.
A good first step in evaluating how to (or if to) improve your heat envelope is to have a home energy audit. During the home energy audit, a trained individual will examine your energy use compared to similar houses and complete at least two elements during an on-site inspection: perform a blower door test and take infrared images to look for heat loss.
Blower Door Test
During a blower door test, a powerful fan is set in an exterior doorway with a covering to block the rest of the door. The fan blows air out of the house, lowering the air pressure inside the house. In a calibrated blower door test, the technician uses the differences in air pressure at a given fan rating along with information on your house to estimate air leakage in the house prior to any improvements. The leakage can be compared to comparable houses and even to building codes to evaluate the need to make improvements and the potential benefits.
There are situations where initial conditions show too many areas for leakage and some remediation may be warranted before a blower door test - like fixing holes, open gaps, or significantly large breaks in door and window seals.
All houses leak air. It is important that homes have some transfer of air to maintain healthy indoor air. The goal is not to eliminate all leakage, just to minimize the leakage. Building codes define the minimum allowable leakage, and a house that is too tight may even require mechanical ventilation to assure air turnover. So the goal is to reduce leakage, but not hermetically seal our home.
The US Energy Department provides more information on blower door tests.
Infrared Imagery
Infrared imagery can help show you where you are losing heat in the winter.
The method converts measurements of infrared electromagnetic waves into the temperature of my walls and ceilings. Infrared imagery should be captured when there is at least a 20° F difference between inside and outside temperatures (warmer or colder). Make sure that the assessor agrees to provide you with the paired infrared and visual light images so you can use them later and refer back to them if you decide to talk to contractors about insulation improvement options or perform the work yourself.
Home Energy Audit Request
When you request a home energy audit, be sure that the following elements are addressed in the scope of work any contractor provides with their scope:
Perform a calibrated blower door test.
Collect thermal images of any unusual areas in the heat envelope collected with paired visual light images. All images will be provided with the final report. The images will be collected when outside temperatures are at least 20° F colder or 15° F warmer than inside temperatures.
A first step in finding a contractor for a home energy audit is to check in with your electric utility. Some utilities offer discounts or credits for home energy audits - like Duke Energy which services parts of North Carolina, South Carolina, Ohio, Kentucky, Indiana and Florida. There are also programs in many parts of the United States offering help to income qualified households (see listing).
Infrared Images and My Home Heat Envelope
The two most valuable elements of our energy audit process were the infrared imagery and also having a contractor included in the process that defined scopes of work for suggested improvements that included firm costs. We had a number of issues, especially with the ways our knee walls were insulated when the house was built 25 years ago. I’ll walk through one area as an example to show you how the infrared images helped us understand and evaluate the issue and also to evaluate the area again after the contractor fixed the insulation.
Our house has a small overhang above the front porch that is outside the heat envelope. This overhang abuts a small storage closet and a bathroom shower on the second floor which are inside the heat envelope. The wall that separates the back of the shower and the storage closet was constructed poorly and had significant gaps in the insulation. I didn’t understand this fully until we were well into this project and were accessing this small area over the front porch that I had never opened up.
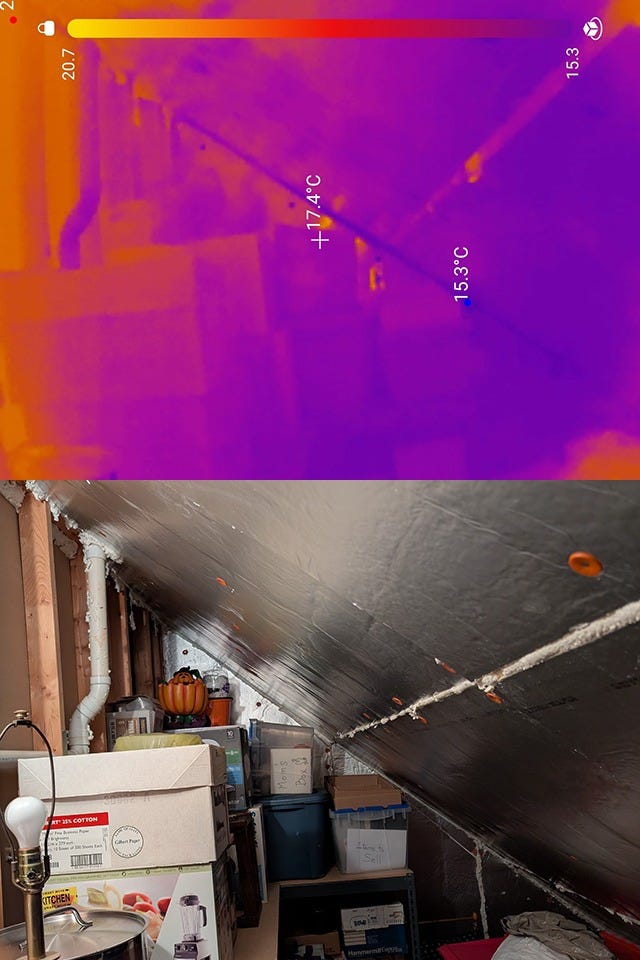
I used an infrared camera to capture both infrared and visual images around our home in 2023 during a hot summer day when our house was cooled by our air conditioner. The images documented the areas where our walls, ceilings and floors were exceptionally warm and allowed heat to enter our house when the air conditioner was on. In the storage room, the plastic sheeting at the back of the storage room was 103° F where the insulation had either settled or never been present. And the back and side of the shower walls were above 80° F. Here are two pairs of images from this area. The hotter portions of the wall show up as yellow or even white with the temperature scale provided in each infrared image.
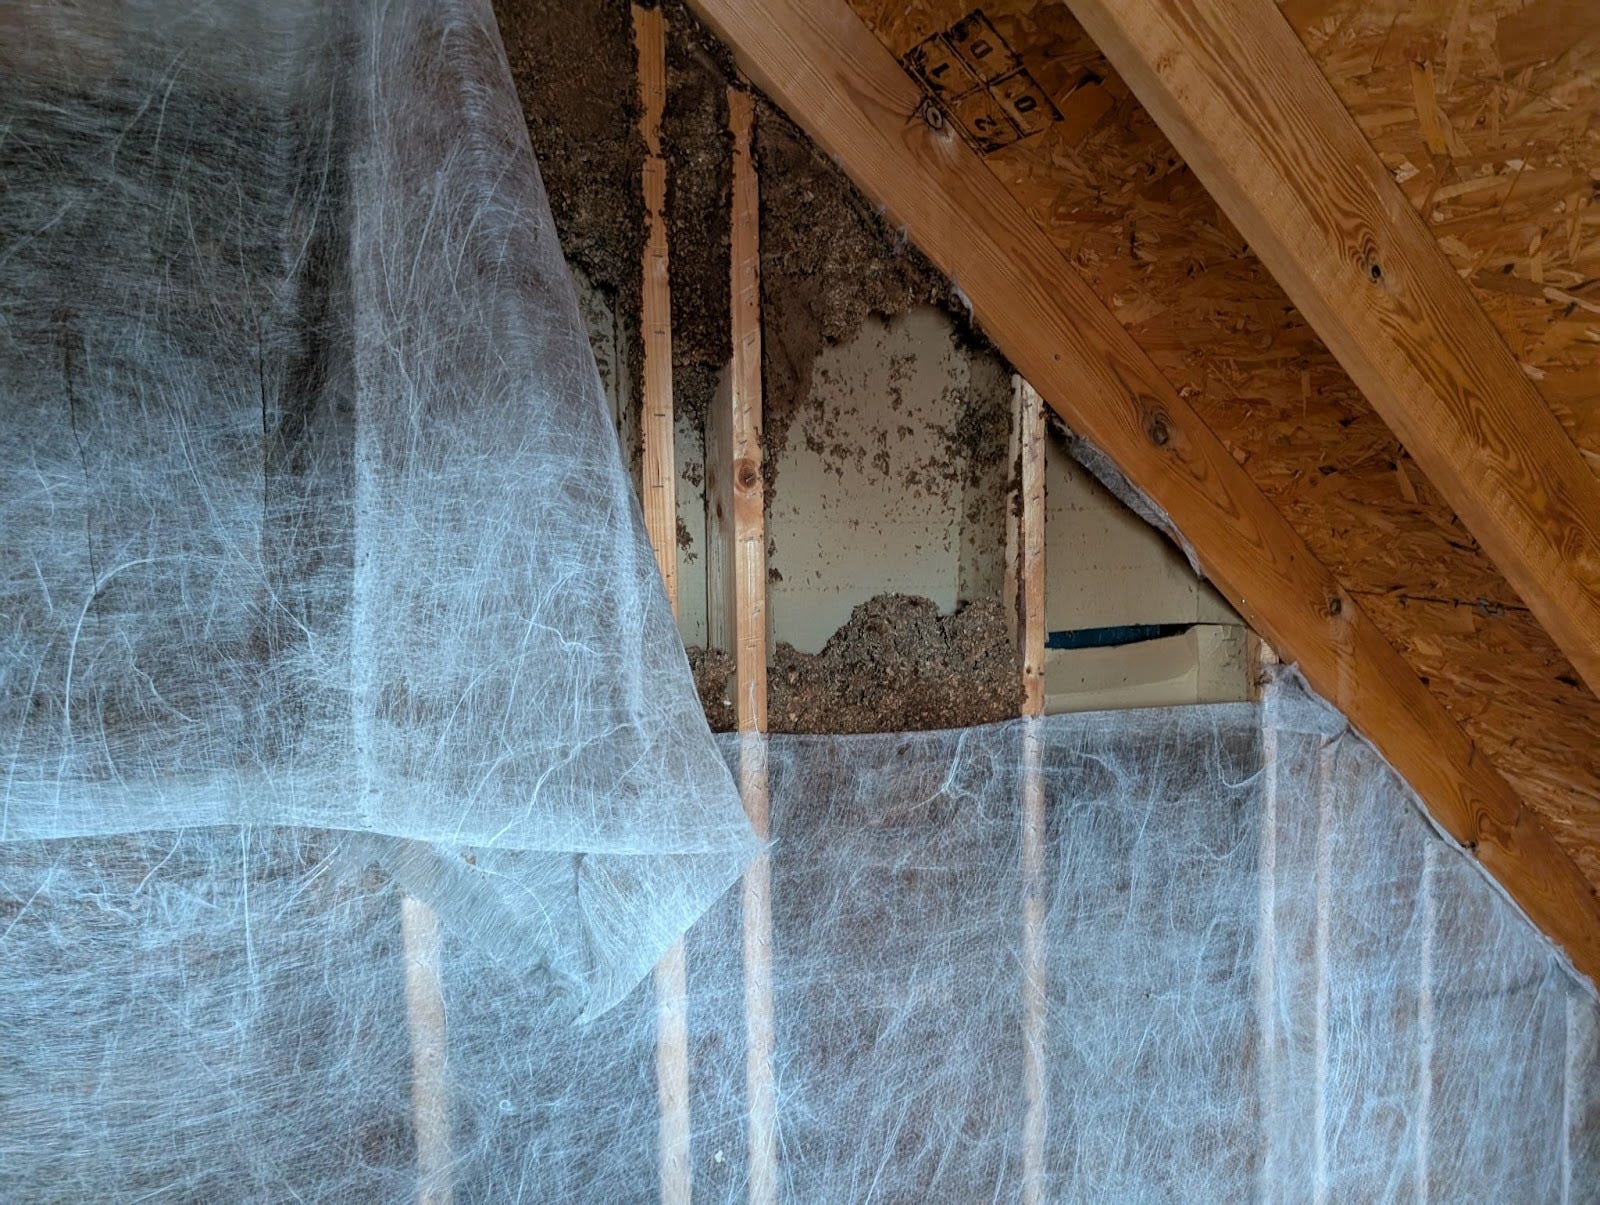
The first pair shows the storage room with adequately insulated ceiling joists on the right, and showing a significant gap in the insulation in the back wall. This insulation gap was so significant, it even allowed visible light to enter the storage room through the plastic sheeting which can be seen in the visual light image.
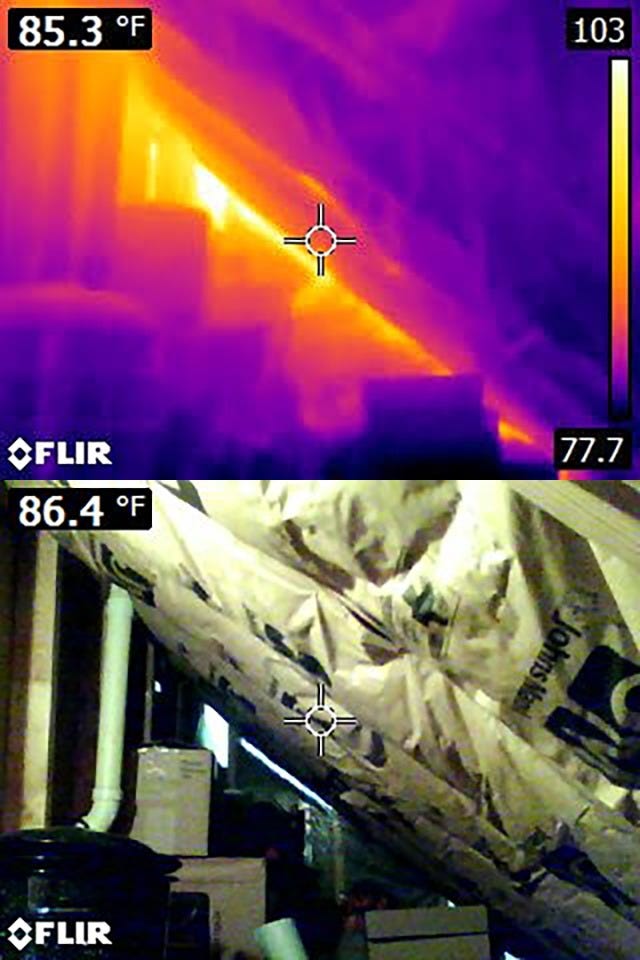
The image pair from the bathroom shows how hot the back of the shower wall was and how this heat extended to the walls of the bathroom.

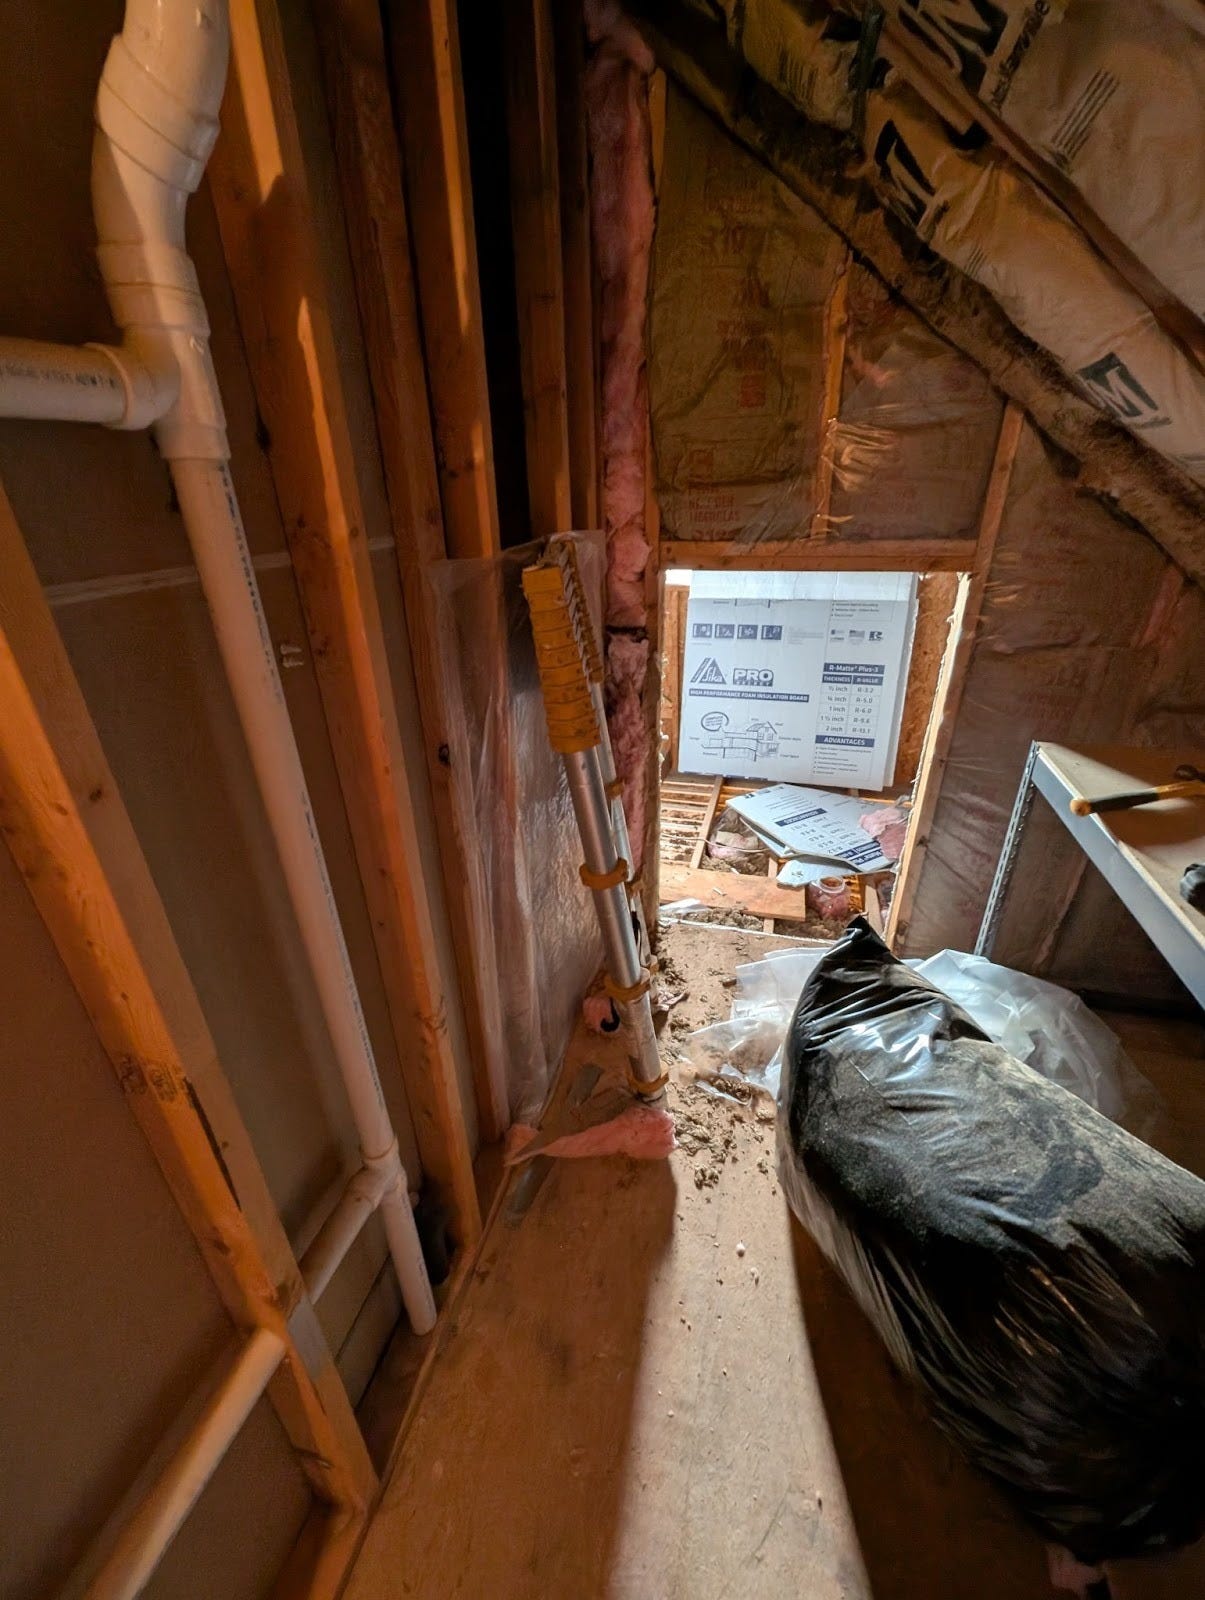
We discussed the project with and then hired a local contractor (Conservation Pros) who gave us a quote to improve our heat envelop for this wall, our knee walls, all of our knee wall and attic access points, and some areas where the blown-in insulation was missing between some joists in the sloped ceilings. When we accessed the area over our porch (outside the heat envelope), the picture below shows an area where insulation was missing from the wall behind the shower.
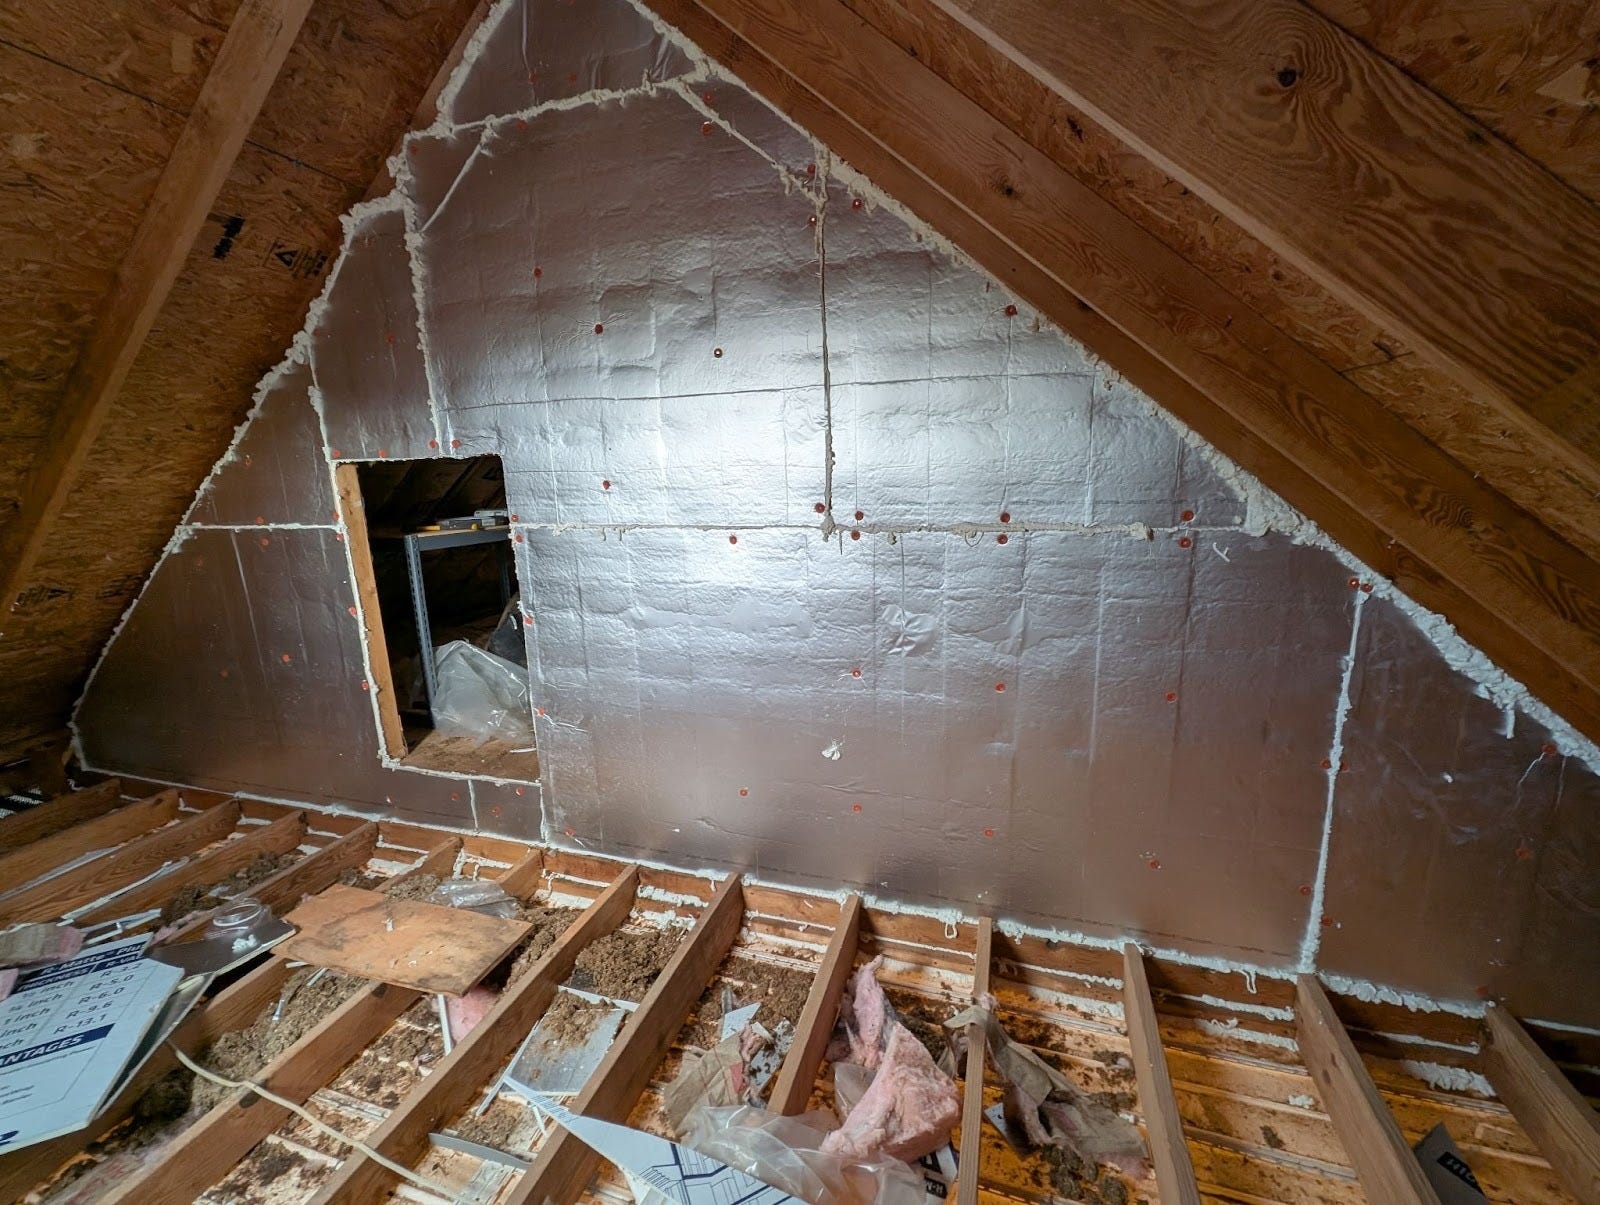
In this area, the contractor removed the poorly constructed blown-in insulation and placed fiberglass insulation between each of the studs. The image below also shows the newly insulated wall (before a cover insulated board was installed) with the small access port to the area over the porch which the contractor also filled with insulation.
To finish, the contractor put insulating rigid foam boards over the insulated stud walls and sealed the gaps.
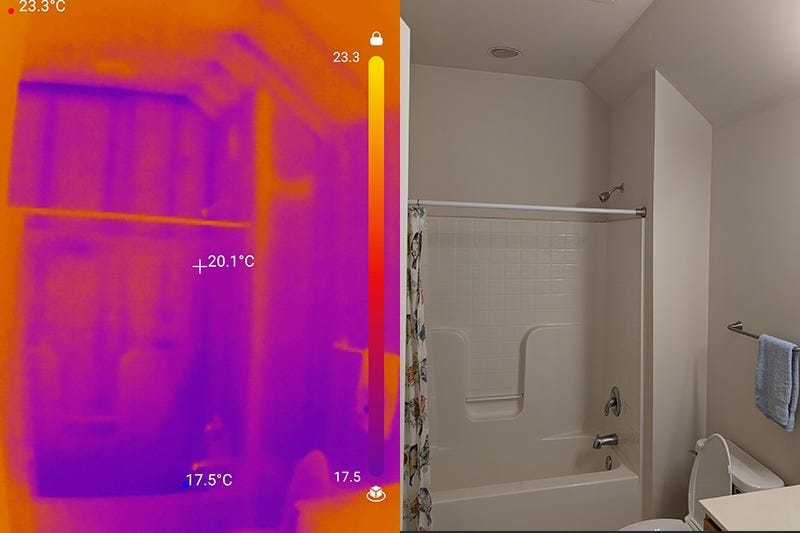
Infrared images taken after the project was complete document how effective this project was at eliminating heat loss (winter) or gain (summer). The following image pairs were taken during a particularly cold period in the winter after the project - so heat leakage would show up as exceptionally cold areas of the walls. The colder portions of the wall show up as purple. In these infrared images there is a temperature scale on the images, and the warmest and coldest spots in the photos are labeled as well as the temperature in the center of the photo. And the walls have a much more even heat profile than during the pre-project image pairs which were taken during a hot summer day.
The image pair from the storage room shows a drastic shift in the range of temperatures on the inside walls of this space.
And the image pair in the bathroom also shows how the back of the shower is no longer leaking heat and the walls no longer show major intrusion of the outdoor temperature.
This project led to a noticeable difference in the temperatures in our house. We also appreciated and gained trust in the contractor’s staff, so we eventually had them encapsulate our crawl space also, improving both the humidity and temperature of the first floor.
I took all of these infrared and visual light image pairs. For the initial 2023 images I was able to borrow a FLIR brand thermal camera from a home energy audit contractor. The device was a bit older, and the images have a low resolution and you can see the lower resolution in the images.
The second, post project images in 2025 were taken with a TOPDON thermal camera attachment for my Pixel and my Pixel phone’s camera for the visual light images. TOPDON offers infrared camera attachments that connect to Pixels or iPhones and sell for under $300. Photography has been a hobby of mine since I was in middle school (my dad was an aerial photographer during World War II, and got me interested in photography.) So I was rather excited to get one and try it out. I have taken similar thermal images to examine heat envelopes at our church and at some neighbor’s homes - it is rather easy and informative.
While I took these images, any good energy audit contractor will provide similar image pairs as long as you stipulate that you want them.
Fireplace: a simple fix
Not all improvements are complicated or expensive.
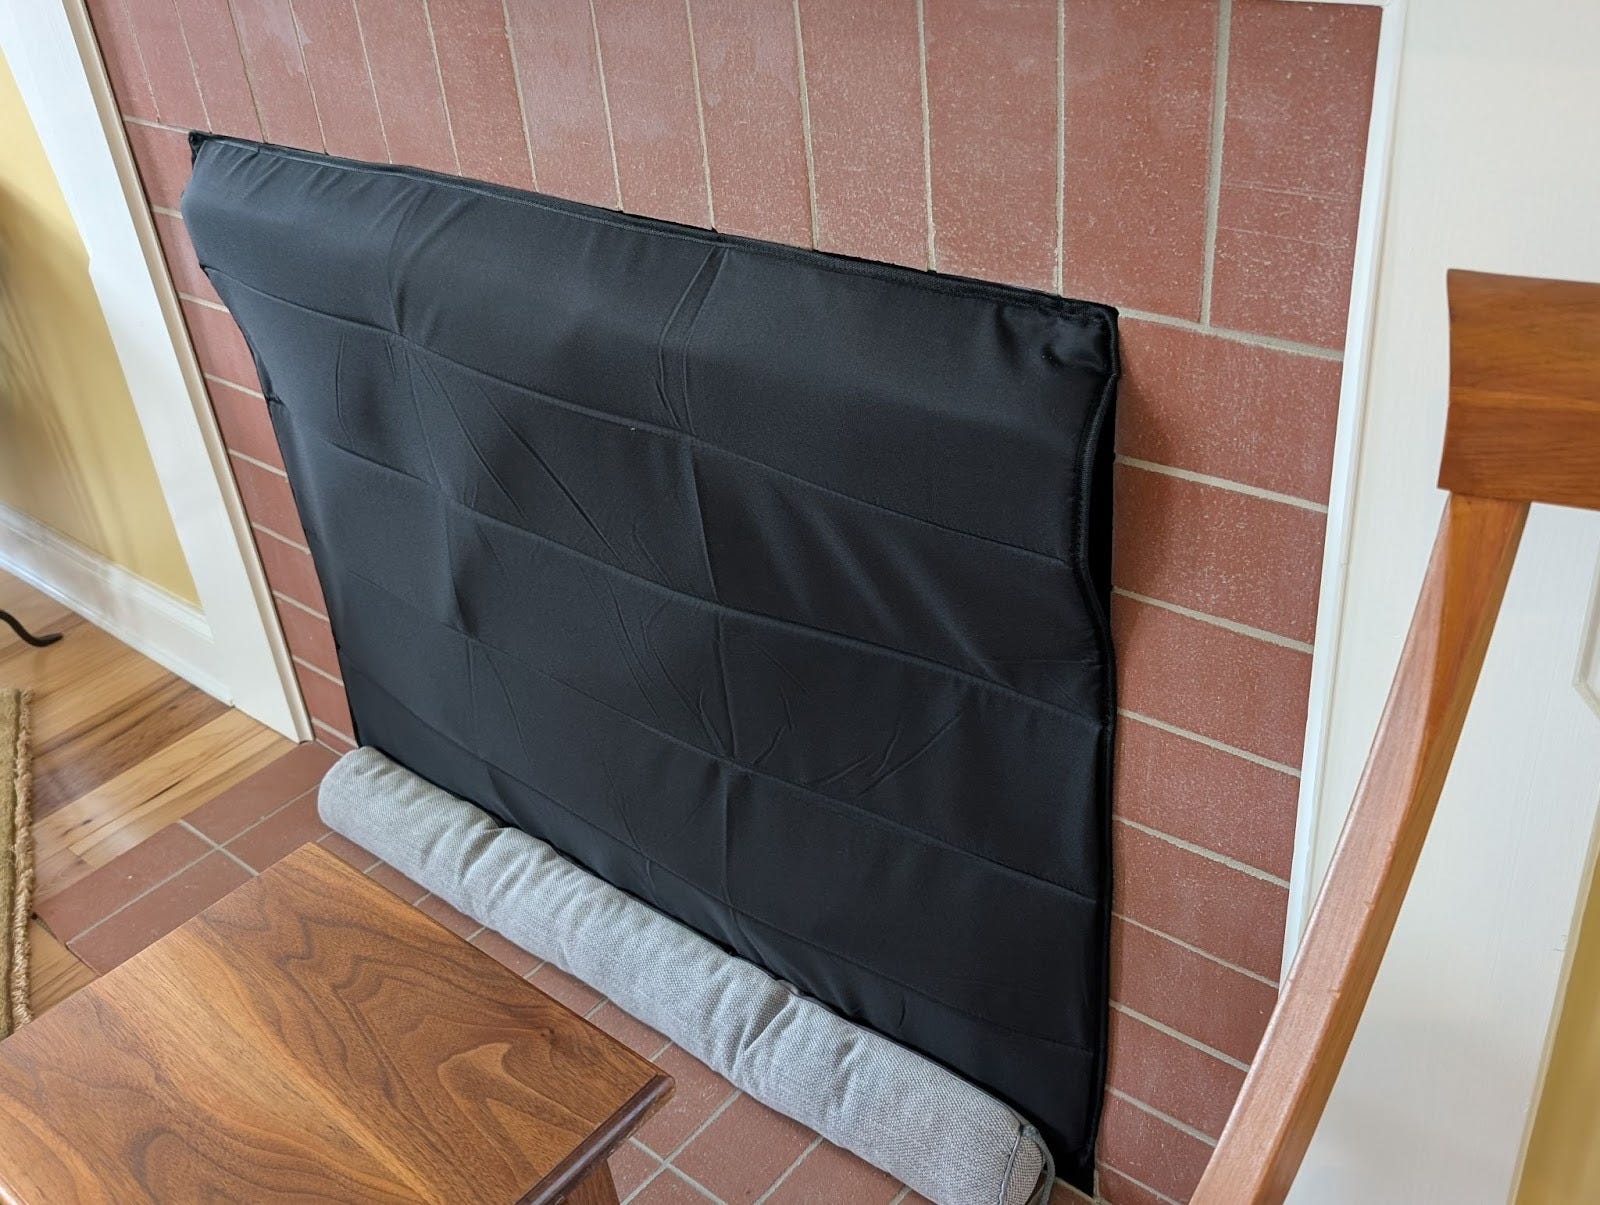
We could feel cold air in the winter and warm air in the summer entering our house from our unvented natural gas fireplace, and the thermal images confirmed the problem. The space behind the fireplace is apparently not insulated. Removing this or insulating this properly had a significant cost, so we choose to simply order a black insulated draft guard cover which is held in place with magnets. This rather inexpensive fix also created a noticeable difference in the cold drafts during winter days in our living room. It’s not the perfect solution, but it is simple, inexpensive and the room is now more comfortable.
Sealing up the drafts in my own home didn’t require an act of Congress or a sweeping federal mandate. It just took a bit of curiosity and a willingness to look closely at the “leaky bucket” I was paying to keep warm.
Once you have optimized your home’s heat envelope—ensuring you actually keep the heat you pay for inside the house—you’ll be ready to evaluate how you generate that heat in the first place. Next week, we will explore heat pumps and options available to maintain a comfortable home while lowering emissions.
Jim
Jim... what a terrific post to take folks through your experience and show the infrared pictures. I was pretty well versed in blower tests but learned a lot here about the details that infrared testing can show. The other thing that jumped out to me as well was the insulated cover for the fireplace, so simple and inexpensive, yet so effective! I'm going to me looking for one of these for sure. I also second your suggestion (below) to contact Let's Go Electric for folks who live in the Asheville area. Is there some website that is a good directory for services like this one and for contractors like Conservationpros that covers national or regional services like these?
Thanks for this very important and informative information. I know that our house has issues. Damage from hurricane Helene revealed areas that needed insulation and there are no doubt more areas that need it as well. It’s drafty in the house due to single pane windows(where we also see occasional mold spots)and the whole place gets too warm in the summer months.
This becomes a health issue also. I’ve become more sensitive to cold as I’ve gotten older and mold can cause serious problems. Do you have a ballpark figure for how much an audit might cost? Our entire house is around 4000 square feet in size. Andrea and I live in the basement apartment which is roughly half that size. Also, are vented attic fans a cost effective option for heat relief along with addressing insulation needs? Thanks again for sharing all of this with us. I think it again underlines the fact that we can do things as individuals that help our planet to heal.
Marty